PhotoCloud
2.0Documentation -> PhotoCloudIndexGenerator
This tool allows you to pre-process your 2D-3D datasets and to generate an additional (.pxi) file which contains an index to all the data together with any additional information to run in PhotoCloud.
Note that this process does not modify any of your input data, but limits to store any additional information in the index file, and possibily generating a nexus 3D model.
Running PhotoCloud Index Generator
After having installed PhotoCloud Index generator, run it by double-clicking on the "PhotoCloudIndexGenerator" icon on your desktop. A window will open like the following:
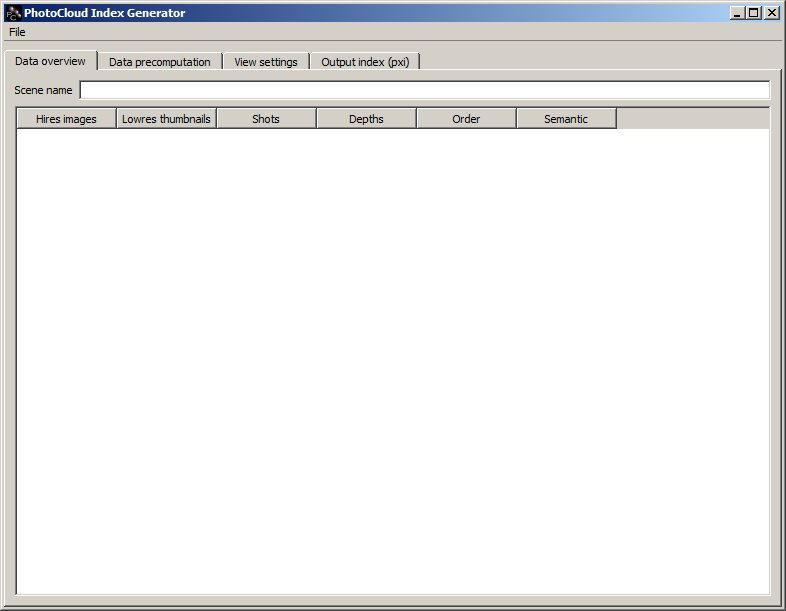
It features a sequence of tabs:
Initially, the Data overview tab is selected and it contains an empty Scene name field and an empty table which will host image-filenames and per-image associated data.
Importing your image collection and 3D model
Select "File"->"Import..." to import your dataset. Input supported formats are: "mlp" (a MeshLab project file) and "pxi" (any previously generated PhotoCloud index file). In the opening file dialog, please indicate your index file and choose Open.
Next, the Scene name tag and the Hires image and Shots columns of the overview table will be filled similarly to the next image.
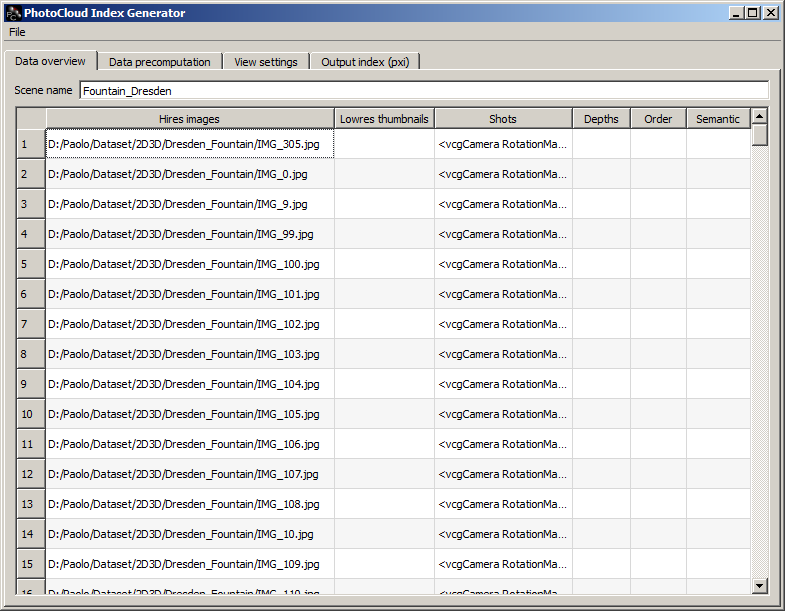
Here, you can only edit the Scene name tag, entering your preferred name (the default one is automatically guessed from the 3D model filename).
The filename of the 3D model will be hosted in another field of the Data precomputation tab.
Note that if your index file contains more than one 3D model, at this stage the PhotoCloud Index Generator will ask you to choose which one to use.
Preprocessing the data
Select the Data precomputation tab.
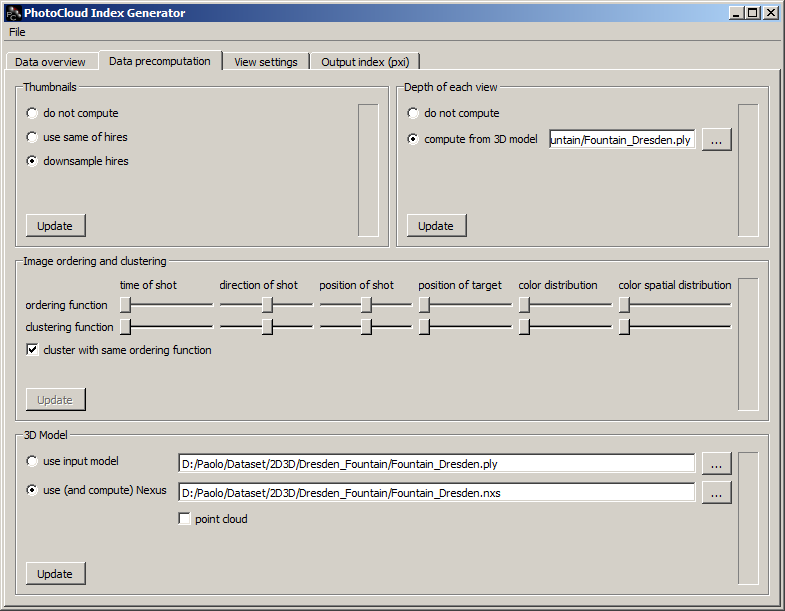
It features four separate processings the data must undergo and which can be run in parallel:
Each is accompanied with an Update button and a progress bar. When new per-image data is ready, a corresponding field is filled in the overview table (in the first tab).
Note that you can process each independently from the others, except Image ordering and clustering, which is enabled only after the Depth of each view is completed.
Generating image thumbnails
This is required to tell PhotoCloud which images to display in the PhotoCloud thumbnail-bar. You have two options:
- use same of hires
- downsample hires (default)
If choosing the use same of hires option, fewer images would be displayed in the PhotoCloud thumbnail-bar. Thus, leaving the default option selected is generally a better choice.
Then, click once the Update button. The progress bar will indicate the processing progress.
Note that if downsampling hires, a "thumbnails" subfolder will be created inside the folder which hosts your high resolution images and it will be filled with image thumbnails.
Computing the depth of each view
This step computes the depth of the 3D scene as viewed from the point of view of each image. This requires a 3D model to be specified: the larger the model, the slower the processing. By default, this field is filled with the filename of the input 3D model. You can also speficy a lower resolution version of your input 3D model in the side text field.
Then, click once the Update button. The progress bar will indicate the processing progress.
Ordering and clustering the images
In the PhotoCloud thumbnail-bar, images are arranged in sequence - from the left side of the screen to its right side - following a predetermined order. In addition, images are clustered into piles, each grouping images which are similar with respect to a specific semantic function. Ordering and clustering are computed at this stage.
You can manually set the two functions by weighting differently the various parameters:
- time of shot - the time at which each image (photograph) has been captured
- direction of shot - the orientation of the camera
- position of shot - the position of the camera
- position of target - the position of the model with respect to the camera
- color distribution - the histogram of the image colors
- color spatial distribution - the texture of the image
By default, the two functions are kept equal, but you can set them independently by un-selecting the cluster with same ordering function checkbox.
When you are ready, click once the Update button. The progress bar will indicate the processing progress.
Note that you can always recompute the ordering and clustering as many times as you want, by changing the two functions and clicking again the Update button.
3D model compression
PhotoCloud supports standard 3D model formats (ply, obj, etc.), but can adopt the Nexus multiresolution format for both visualization efficiency and scalability. If your 3D model is not small, it is strongly suggested to compress it with Nexus.
- use input model - sets the 3D model indicated in the text field at right in PhotoCloud visualization. If you already have a Nexus 3D model, simply specify it into the text field at right.
- use (and compute) Nexus - compressed the input 3D model to the Nexus format and stores the resulting model in the filename indicated in the text field at right. The "nxs" file extension is mandatory.
If you choose to compress your input model, please take care of selecting the point cloud option if the model is defined as a point cloud.
Then, click once the Update button. The progress bar will indicate the processing progress. This process can take a lot of time, depending on the size of the input 3D model.
Note that you must click the Update button even if you choose to use the input 3D model.
Optional view settings
PhotoCloud presents the dataset with a set of default options, which can be modified when generating the index file. To change them, first select the View settings tab.
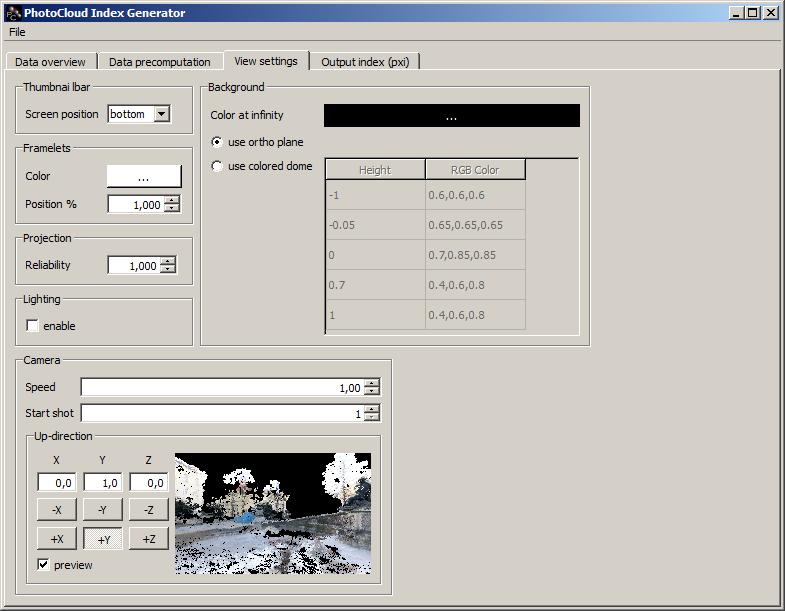
In this tab, we can distinguish the following options:
- Thumbnail-bar - the thumbnail-bar can be shown at the top or the bottom (default) of the screen.
- Framelets - framelets (the wireframe polygons which represent images in 3D) can be colored at preference, and each can be placed anywhere between the position of the camera which shot the image and the 3D model. By default they are placed tangent to the 3D model. To avoid them clutter, you can diminish the Position % parameter (e.g. set it to 0.1) which causes the framelets to be placed nearer to the camera shooting position.
- Projection -
- Lighting - if your model has per vertex normals, you can add a lighting by selecting the enable check box.
- Background - the scene background color can be changed by clicking on the Color at infity button. By default, it is set uniformly, but you can choose to render a colored skydome mesh instead, by selecting the use colored dome option. The small table at its right parametrizes the skydome (the default is a good choice).
- Camera - the virtual view inside PhotoCloud has a default speed. However, if you need faster or slower movements, you can alter the Speed multiplier at preference. In addition, PhotoCloud starts the navigation from the point of view of a given image. By default, it is the first image in the collection, but you can change it by selecting a different Start shot among those available.
- Camera up-direction - often the 3D model is expressed in a frame which is rotated w.r.t. the one adopted in PhotoCloud. In this case, all you need to do is to edit the X, Y, Z fields (or select any predefined option-button) to virtually rotate the scene.
By selecting the Preview check box, the 3D model is rendered from the view of the starting shot and oriented according to the specified up-direction.
Output index (pxi)
Once all data has been preprocessed and you have set your preferred view settings, you are ready to generate the PhotoCloud index file. Then, select the Output index (pxi) tab.
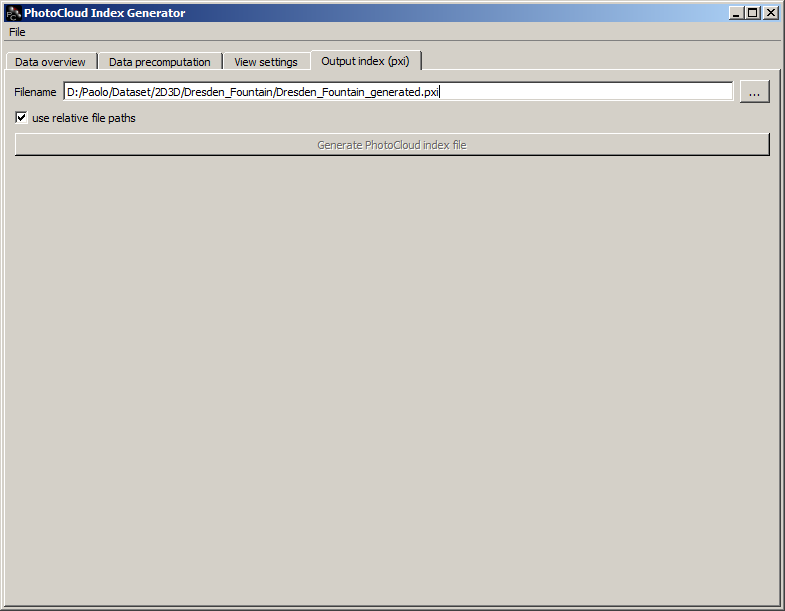
If everything has gone right, the Generate PhotoCloud index file button is enabled.
The index file has pxi extension (which is automatically associated to the PhotoCloud application during the installation). You can change the output filename at your preference, but be careful to keep it in the same folder where your input (mlp or pxi) file resides.
By default, the index file will contain all relative paths to the images, the image thumbnails, and the 3D model. This is particularly useful if you plan to change the location of your dataset (e.g. move it on some other PC).
Finally, click on the Generate PhotoCloud index file button. When finished, a dialog window will be displayed confirming the generation.